
How to Build free and local No-code AI Automations on your own PC
Using Local LLM’s and open-source no code tools

Summarize emails, batch process anything, extract information or generate knowledge graphs and score your diary entries, all on your PC at home by using open-source models and automation software, a comprehensive guide with the automations pre-built. You don’t have to write a single line of code.

The shift to local solutions
In January of last year, I set up an automation in Zapier to summarize my incoming emails into Google Sheets using GPT-3, so that I could have a neat overview of my incoming emails and easily find things. This was fun to set up, but I couldn’t just send all of my e-mails to OpenAI. After testing that it worked on a small subset of spam I received, I shut it down for that reason.
Over the past year, the world of open-source AI hasn’t been sitting still and I felt it was time to revisit this — but do it better by running everything locally, from my PC at home. Keep all the data to myself, and show that we can build useful things without having to send our own data over to some of the big tech companies.
Small models have gotten a lot better, and while you can’t expect GPT-4 levels of performance, for smaller tasks like extracting information, summarizing, or categorization, they can still be great. On top of that, they’ve become very easy to run.
How to automate anything using Local Models
I want to show how it’s done and give a few really cool examples. We’ll be working on how to build an e-mail summarizer that neatly stores everything, and I’ll give a few more examples.
There are two tools we use, and neither requires any programming.
Run Local Automation
For the automation, we’ll be using n8n. It’s a free, open-source program you can run on your program that has similar functionality to Make.com and Zapier.
First of all, to get n8n to work, you must have Node.js installed. Once you have it installed, open the terminal (on windows press start — then type in “run”). In the command window that opens up, type the following and hit enter:npx n8n
This command will download and install n8n. Once done, you can start building by going to this link in your browser:
http://localhost:5678
Now the first part is all set!
Run LLM’s Locally using LM studio
With LM Studio, you can install it just like any other program, and download and load models that can be run on your PC. It’s straightforward to select a model and run it, but finding the right one at the right size can be a bit more challenging. Don’t be alarmed though, this can be kept simple and accessible. I’ll simplify it to four options. This won’t squeeze maximum performance out of your hardware, but it’ll work just fine for the automation.
First, we’re picking out two models: Phi-2 and Mistral-7B. Both are extremely good for their size, with Phi-2 being the smallest model.
Phi-2 can run on just about any PC or laptop, it can even be run on non-flagship phones.
If you have some decent hardware, like a gaming PC or workstation, then I’d suggest going for Mistral-7B. More than twice the size of Phi-2, it is a bit better and more consistent.
To make it simple:
+-------------+--------------+--------------------------------+
| Model Choice| Quantization |        Recommended Hardware    |
+-------------+--------------+--------------------------------+
|     Phi-2   |    Q4_K_M    |        Old PC/Laptop           |
+-------------+--------------+--------------------------------+
|     Phi-2   |      Q8      |        Regular PC/Laptop       |
+-------------+--------------+--------------------------------+
|  Mistral-7B |    Q4_K_M    |        Gaming PC               |
+-------------+--------------+--------------------------------+
|  Mistral-7B |      Q8      | Workstation/High-End Gaming PC |
+-------------+--------------+--------------------------------+
In both cases, type in the model and click on the most popular version at the top left.
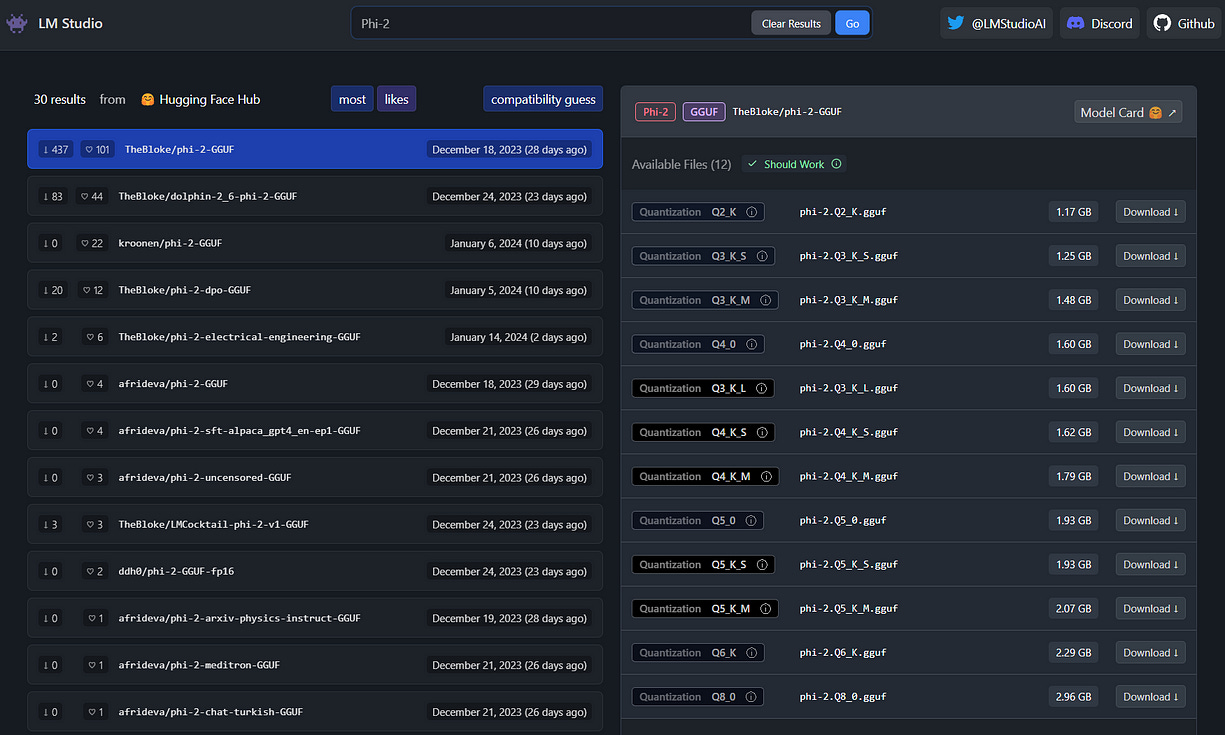

But now there are 16+ options on the side with Q2 up until Q8?! Don’t be alarmed. These are “Quantized”. Quantization is a bit like turning a super high-quality audio file into an MP3. It rounds down a bunch of stuff in the model, meaning that for a slight quality hit it will significantly reduce the size of the model.
For both models, follow the table above and test it out. It’s easy to swap out if it doesn’t run to your liking.
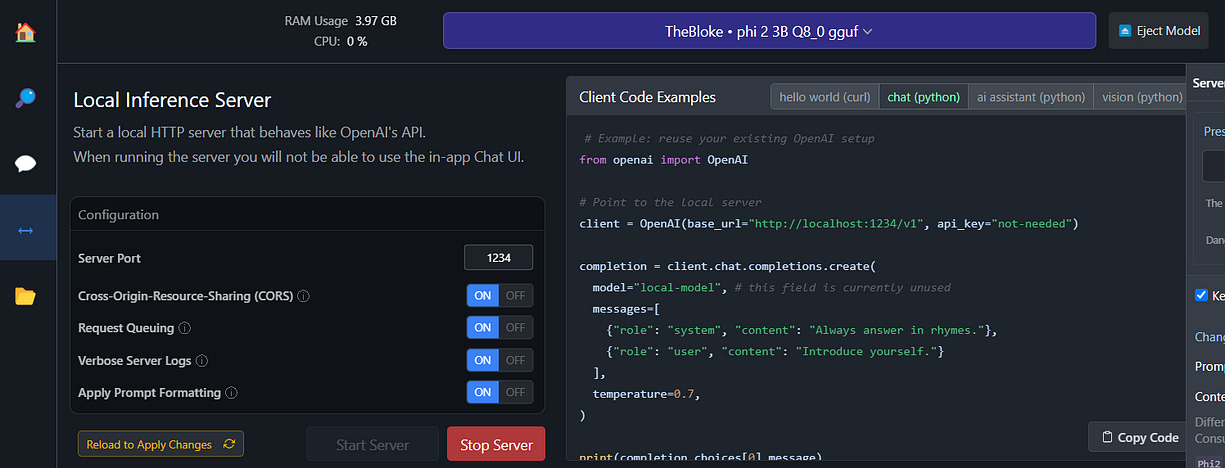
Once downloaded, you can load the model and test it out in chat. For the automation part, we’ll be moving to the server tab.
Go to the server tab on the left, and hit the start server button.
Time to build the automation
With both LM Studio and n8n up and running, we can get to the fun stuff!
To make this easy, n8n allows you to import workflows others have built. I’ve pre-built the whole automation so you can work with this with ease.
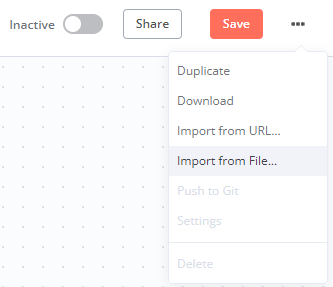
Go to n8n (http://localhost:5678), and create a new Workflow. Then, in the top right Import from File.
Import the following file:
Once done, it should look something like this
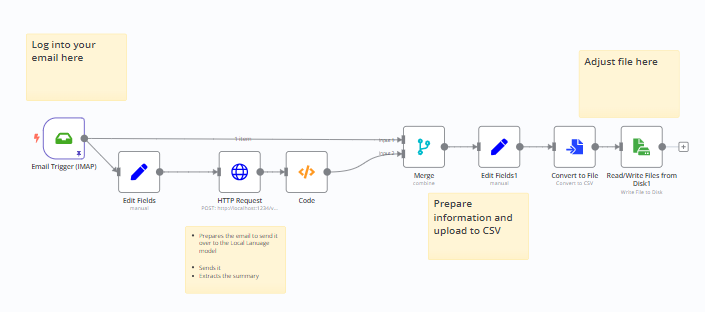
Email information. You can generally find this information in your e-mail client.
Location of the CSV file. In the very last node, set a file location with a file name.
And you’re all set! Make sure LM Studio server is up and running, and watch the magic unfold.
Once set you can load this CSV file into any program that can handle it, and filter based on a bunch of information. If you run this for a little while, you can look up
Building different types of Automations
At the start, I mentioned a few other options, like classifying email. I’ll provide another workflow that could be used for a million different use-case, processing CSV files.
Just like an excel file where you have a bunch of rows, you can process each row, structure it however you’d like, and send it over to your local language model.
This means you can batch process and let your own PC take care of this.
For example, if you have a CSV file with product names, you can do:
Write a catchy product description for {{Value in column 1}}, make sure it mentions {{Value in column 2}}.
Or, for example:
Extract the name mentioned in: {{Value in column 1}}
You can let your computer run overnight and have it take care of time intensive tasks while you sleep, without having to send sensitive data to anyone.
This simple automations will allow you to drag and drop elements of your CSV file and insert those into your prompt however you’d like.
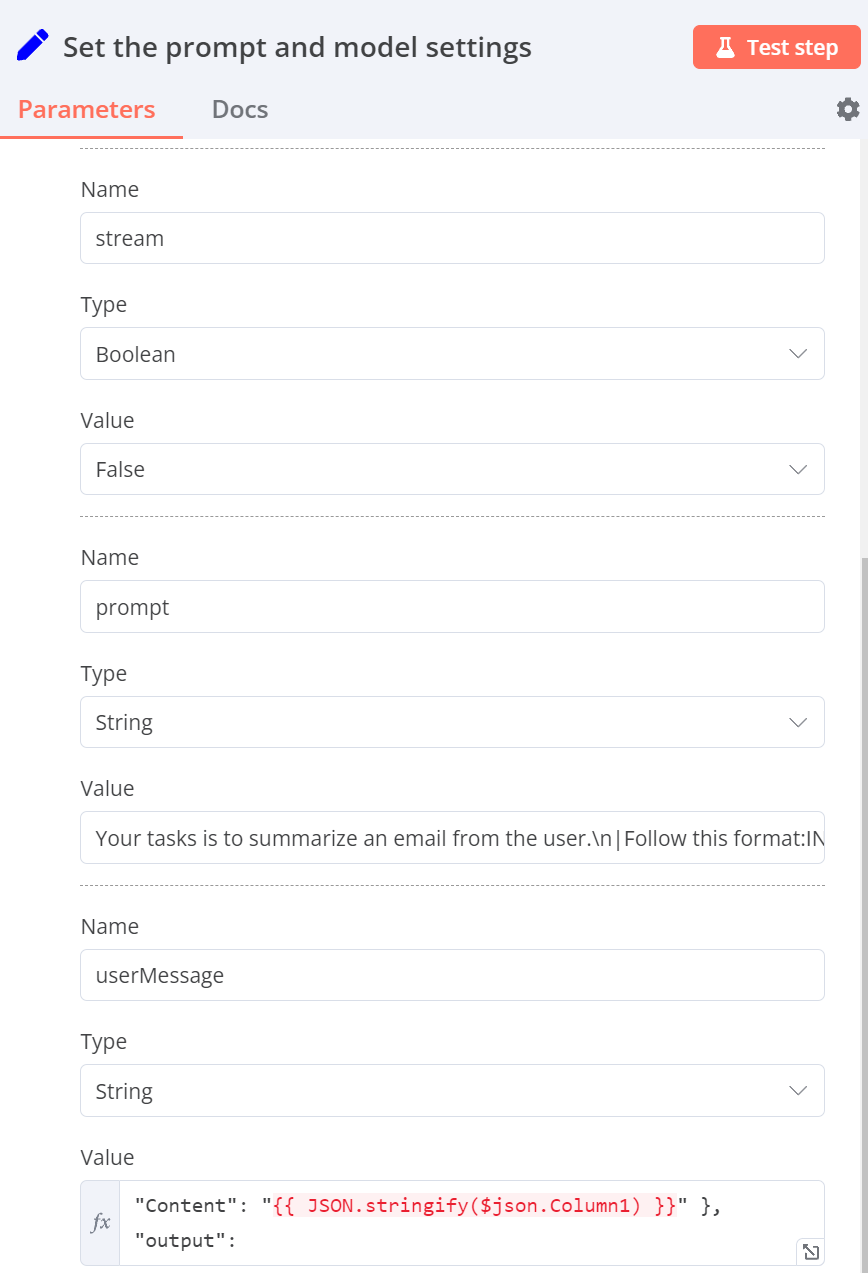
Inside the “Set prompt and model settings” node you can adjust a few things like the prompt and usermessage. The prompt goes into the System Message, in other words the first instructions for the model. Then follows the userMessage, in this case I’ve set it up as a basic JSON format. This doesn’t have to be structured that way, but it’s good practice to guide the model and be able to extract the information.
The Code block is set up to handle any of the JSON that you get as an output from the model, so you can use the extracted information however you want to. Again, you could leave it all out and keep it more simple, but it’s a small but useful addition.
You could use this for a large amount of tasks, whether that’s extracting information, drafting product descriptions, generating knowledge graphs, all on your own PC.
I have to say, while n8n is very flexible, it relies heavily on some fairly basic coding principles that a more seasoned programmer would find easy to work with, but aren’t as common sense to the average person.
While Make.com is a bit more accessible and Zapier even more so, this does have its benefits. ChatGPT is much more suitable for debugging problems and helping along the way. A little example as I struggled with setting something up:
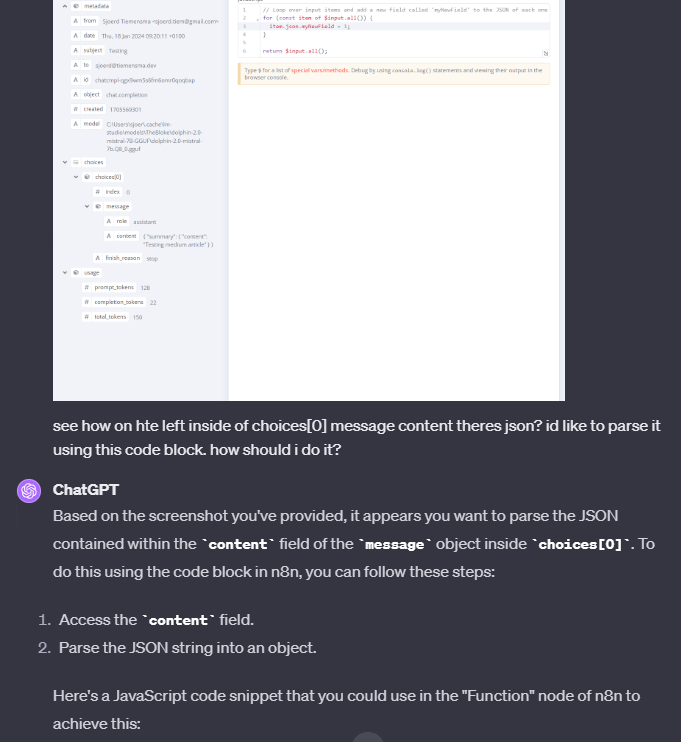
ChatGPT instantly came up with the solution, which was about 10 lines of code. This is one great examples, since n8n relies on JavaScript, GPT-4 has no problem at all helping less experienced people like me get exactly out of it what I want.
The possibilities here are endless, so go around and mess with these tools! And like I did here, if you run into problems, ChatGPT is (almost) always there to help.